Considering how much I love to can, it's no surprise that I'm a bit of a evangelist about it. The taste difference between store bought and homemade is phenomenal. Once you taste fresh strawberries preserves with not a drop of HFCS and made with just a bit of balsamic vinegar or a vanilla bean, you can't go back.
I've taught a class at the local rec center on canning and turned several ladies into converts who not only continued to can, but exceeded my skill level.
And I have friends who I can't stand in the kitchen with who want to can but are a bit intimidated by the process. So I thought I'd write a little tutorial.
Because it's actually easier than baking a batch of cookies.
In this post, let's talk equipment.
There are all sorts of fancy canning equipment out there now. From the Fresh Tech (which I actually have and love for the quick convenience) to special bubble removers, the canning supply section of Amazon or your local hardware store can be intimidating. So let's break it down to the bare necessities.
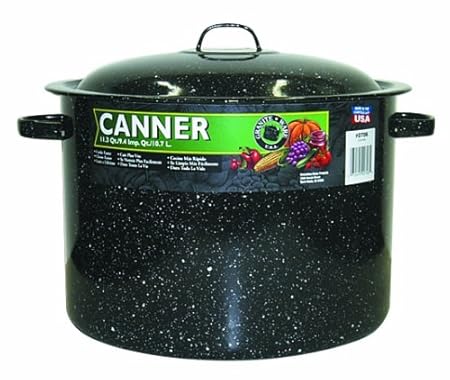
Canning Pot
The standard canning pots are not very expensive and will last for years. In fact, I still use my ex's grandmother's canning pot and it works like a charm - even if it looks like it was on the losing end of a battle with hard water.
Ball makes a great beginners insert set if you have a large stock pot. This guy will process three pints at a time.
If you don't want to buy anything, you can also twist tie six rings into a flower shape and set it at the bottom of a large pot. I've done this when I canned a week or so after moving and couldn't find my equipment in the pile of boxes in the garage.
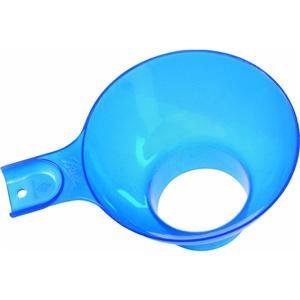
Funnel
Unless you have a spouted pot, you need a funnel. I prefer light colored ones to allow me to see where the top of my jar is.
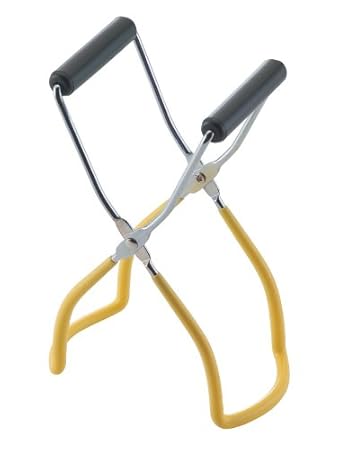
Trust me, you want one of these when you're reaching into boiling hot water. Regular tongs just don't work as well.
There are also kits that will give you everything you need to get started. They usually run under $60 and might be your best option when starting out.
Jars
The jars sizes depend on what you're canning. If you're doing jams and jellies, I'd suggest half pint. If you're making gifts, then quarter pints. Salsas, sauces, and relishes do well in pint jars. Pickles, tomatoes, marinara love quart jars.
Not so intimidating is it?
(That's because I'm not talking about pressure cookers today.)
Part 2 will talk a little bit about recipes and the actual canning process. You'll be surprised at how easy peasy it is.
4 comments:
I'm so glad you're doing this! I planted way too many cucumbers to not need canning suggestions.
If John sees this, we will be canning now too along with making our own peanut butter.
Pickles! And relish!
We're making our own peanut butter now too. Don't tell anyone, but while the kids like it, I'm thisclose to sneaking in a jar of Skippy.
Also, you'd love canning. It's fantastic. :D
Post a Comment